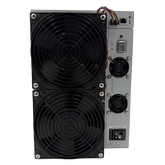
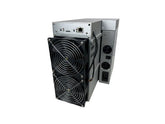
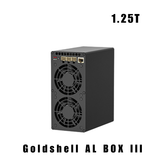
Set up your Antminer and start mining Bitcoin
Prerequisites:
- Have a wallet on the coin you want to mine (Bitcoin)
Ⅰ. Before using
-
Inspect the new miner
1. Visually inspect the box upon arrival of your miner. Look for signs of damage. If the packaging is damaged, take photos of the condition of the packaging before opening the box and inspecting the machine. If the machine is also damaged, contact customer service immediately.
2. Inspect the machine for cosmetic damage. Examine the corners of the unit for dents or cracks. Check the fan blades and cables for breaks. If you notice any damage or defects, contact customer service immediately.
3. Evaluate the miner's heat sinks. Examine the miner's front and rear fans to see if the heat sinks are loose. If you find any loose heat sinks, contact customer service immediately.
-
Know the precautions for use
1) PoE is not supported.
2) Only connection to an Ethernet network is possible via a router or switch.
3) Use the miner in an environment between 5 and 35 degrees Celsius.
4) Keep the machine's ambient humidity below 65%.
5) Keep the miner free from dust and moisture to prevent corrosion and/or heat build-up.
6) Supported browsers: Google Chrome and Firefox.
7) The power connector and power supply cord must be securely connected.
Ⅱ. Server Overview
Front View Back View
Attention :
-
Please refer to the above provision for placing your products in case of damage.
-
The appliance must be connected to an earthed socket outlet. The socket outlet must be installed near the appliance and be easily accessible.
-
The equipment has two power inputs; the equipment can only operate by connecting both power sockets simultaneously. When the equipment is powered off, be sure to turn off all power inputs.
-
DO NOT remove screws and cables attached to the product.
-
DO NOT press the metal button on the lid.
III. Server Components
The main components and front panel of the server controller are shown in the following figure:
1.2、APW12 Power Supply:
IV. Server Configuration
To configure the server
The IPReporter.zip file is only supported by Microsoft Windows.
-
Go to the following site: https://shop.bitmain.com/support.htm?pid=00720160906053730999PVD2K0vz0693
-
Download the following file: IPReporter.zip.
-
Extract the file. The default DHCP network protocol distributes IP addresses automatically.
-
Right-click on " IPReporter.exe " and run it as administrator.
-
Select one of the following options:
■ Shelf, Step, Position - suitable for farm servers to mark server locations.
■ Default - suitable for home servers. -
Click on " Start" .
On the controller board, click the IP Report button. Hold it down until it beeps (about 5 seconds).
The IP address will be displayed in the window.
-
In your favorite browser enter the IP address of the machine
-
Log in using root for both username and password.
-
In the Protocol section, you can assign a static IP address (optional).
-
Enter the IP address, subnet mask, gateway, and DNS server.
-
Click on " Save ".
-
Click on https://support.bitmain.com/hc/en-us/articles/360018950053 to learn more about gateway and DNS server.
V. Pool Configuration
To configure the server:
-
Click on the frame marked below. * Note:
-
The fan speed percentage can be adjusted, but we recommend keeping the default setting. The server will automatically adjust the fan speed if the fan speed percentage has already been selected.
-
There are two operating modes for the 19 Series servers: Normal mode and Sleep mode. The server enters Sleep mode if the control board is powered while the hash boards are not.
2. Configure mining pool settings
Click the " Miner Configuration " tab to configure mining pools. Enter the mining pool URL and miner name (under Worker).
We configure the Ordina Mining pool available on this link https://dashboard.ordina-mining.com
The information for the pool is:
Pool 1: btc.ordina-mining.com:6100
Pool 2: btc-bkp1.ordina-mining.com:6100
Pool 3: btc-bkp2.ordina-mining.com:6100
In Miner name, put your bitcoin address then “.” followed by the worker name (name of the machine in the pool dashboard display)
Then click “ Save ” to connect to the pools.
You can check after 1 hour if the shares are submitted to the pool via this link:Understanding and viewing your mining statistics on the Ordina pool
*Note: In this article, we use ORDINA-pool. Feel free to use other mining pools if you wish.
VI. Monitoring your server
To check the operating status of your server
1. Click on the dashboard shown below to check the server status.
The firmware will stop working when the temperature (output) reaches 85℃ ,there will be an error message "over max temp, pcb temp (real-time temp)" displayed at the bottom of the kernel log page. Meanwhile, the server temperature on the dashboard interface becomes abnormal and displays "Temp is too high".
2. Monitor your server according to the descriptions in the following table:
|
Option |
Option Description |
|
Number of chips |
Number of chips detected in the chain. |
|
Frequency |
Adjusting the ASIC frequency. |
|
Actual hash rate |
Real-time hash rate of each hash map (GH/s). |
|
Inlet Temp |
Inlet temperature (°C). |
|
Outlet temperature |
Outlet temperature (°C). |
|
Chip status |
One of the following states is displayed: ● Green icon - indicates normal status. ● The red icon - indicates an anomaly |
After 30 minutes, your machine should have started sending shares to the pool, to see your mining has started please go to the pool interface using your wallet.
VII. Server Administration
7.1 Checking the firmware version
To check the firmware version:
-
Go behind the scenes of your server, find the firmware version at the bottom.
-
Firmware Version displays the date of the firmware used by your server. In the examples below, the server is using the firmware version
7.2 Checking the firmware version
-
Make sure the server remains powered during the upgrade process. If the power goes out before the upgrade is complete, you will need to return it to Bitmain for repair.
-
To upgrade the server firmware:
-
In System , click " Firmware Upgrade ".
-
To Maintain Settings :
■ Select " keep settings " to keep your current (default) settings.
■ Deselect " Maintain settings" to restore the server to its default settings. -
Click the button
and navigate to the update file. Select the upgrade file and then click " Upgrade ".
-
When the update is complete, restart the server and the configuration page will be displayed.
7.3 Changing the password
To change your login password:
-
In System , click on " Password "
-
Set your new password, then click " Save ".
7.4 Restoring initial settings
To restore your initial settings
-
Power on the server and let it run for 5 minutes.
-
On the front panel of the controller, press and hold the Reset button for 10 seconds.


